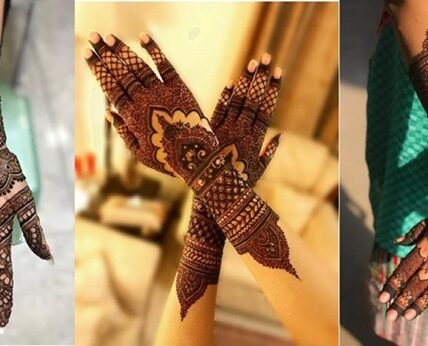
Mehndi, also called henna, is an ancient art form cherished for hundreds of years. Whether it’s miles a wedding, pageant, or any special event, mehndi provides a touch of splendour and beauty to arms and feet. Many people accept that drawing mehndi designs is a complex venture, but with the right techniques, mehndi design drawing may be easy and fun. If you are a newbie looking for easy yet stylish mehndi designs, this manual will assist you in apprehending the basics and mastering the art with no trouble.
Understanding Mehndi Design Drawing for Beginners
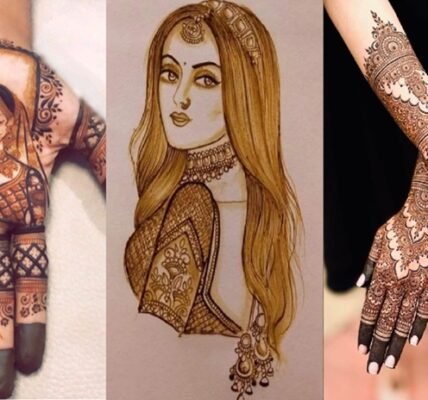
Mehndi layout drawing isn’t pretty much making use of henna for the pores and skin, but also approximately creating stunning styles that beautify the general look. The key to drawing mehndi without problems is initially easy patterns and regularly flow to greater difficult ones. The fundamental factors of the mehndi layout encompass strains, dots, curves, flora, paisleys, leaves, and mandalas. By gaining knowledge of these basic shapes, absolutely everyone can create stunning Mehndi design effects.
1. Essential Tools for Easy Mehndi Design Drawing
Before starting with the mehndi layout drawing, it’s miles critical to have the right gear. Here are the critical objects you need:
- Mehndi Cone: A geared-up-made henna cone is the first-rate choice for beginners because it allows smooth software.
- White Paper and Pencil: Practicing on paper before applying on palms facilitates building self-assurance.
- Plastic Sheet or Transparent Paper: It can be used for tracing and practising one-of-a-kind styles.
- Tissue Paper or Cotton Swabs: Helps in correcting mistakes.
- Lemon-Sugar Solution: This continues the mehndi wet for an extended time and enhances the colouration.
2. Simple Mehndi Design Patterns for Beginners
For novices, it’s far quality to begin with clean mehndi designs that require minimum attempt but look attractive. Here are some simple mehndi layout ideas that you could practice:
Floral Mehndi Designs

Floral patterns are one of the maximum generally used mehndi designs. They are easy but stylish and can draw results easily. To create a floral mehndi design:
- Start with a small circle inside the middle.
- Draw petals around the circle to shape a flower.
- Extend leaves and vines to connect different vegetation.
- Add small dots and features to enhance the design.
Paisley Mehndi Designs

Paisleys (additionally referred to as mango, but designs) are a traditional element in mehndi styles. This design is straightforward to attract and looks fashionable. Steps to draw paisley mehndi designs:
- Start with a curved teardrop form.
- Outline the form to make it bolder and more prominent.
- Fill the paisley with small patterns like dots, traces, or mini vegetation.
- Connect multiple paisleys with curvy vines to make the design waft easily.
Mandala Mehndi Designs

Mandala mehndi designs are round styles that are smooth to attract and look beautiful on fingers. Here’s the way to create a simple mandala mehndi layout:
- Draw a small circle within the middle of the palm.
- Surround it with large circles and ornamental elements like petals, leaves, and dots.
- Add layers to enhance the design and provide it with a fuller look.
- Ensure the design is symmetrical and well-balanced.
3. Step-through-Step Guide to Drawing Mehndi Easily
To make mehndi drawing easy for novices, follow those step-by-step commands:
Step 1: Choose a Simple Design
Beginners have to begin with a small and smooth mehndi pattern. It is always better to exercise on paper before applying it to the pores and skin.
Step 2: Hold the Mehndi Cone Properly
Holding the mehndi cone efficaciously could be very crucial for easy utility. Hold the cone like a pen and observe mild stress to control the float of henna.
Step three: Start with Basic Shapes
Begin by using drawing small flowers, dots, paisleys, and curves. Once you get cushy, circulate on to larger and more complex styles.
Step 4: Connect the Patterns
To make the layout appearance entire, join the exclusive factors with curved strains, vines, and swirls.
Step five: Fill the Empty Spaces
Adding small info like dots, tiny flora, and skinny lines can decorate the general design and make it appear more professional.
Step 6: Let It Dry and Apply Lemon-Sugar Solution
After finishing the design, allow it to dry completely. Apply a combination of lemon and sugar to darken the colour and help the mehndi remain longer.
4. Easy Mehndi Designs for Different Occasions
Different occasions are named for one-of-a-kind mehndi patterns. Here are some easy mehndi designs appropriate for diverse occasions:
Bridal Mehndi Design (Simple Version)
A simple bridal mehendi layout can include small flowers, paisleys, and elaborate finger designs. For a present-day touch, depart a few areas among the patterns to create an elegant and elegant appearance.
Festival Mehndi Designs

For gala like Diwali, Eid, or Karwa Chauth, choose easy floral patterns and small mandalas. These designs are smooth to draw and do now not take an awful lot of time.
Kids’ Mehndi Designs
Kids decide on cute and simple mehndi designs. A small butterfly, heart, or tiny floral layout at the again of the hand seems lovable and could be very easy to attract.
Minimalist Mehndi Designs

For folks who love minimalist mehndi, drawing small plants on the palms or a tiny mandala at the palm can be a high-quality desire. These designs are modern-day and no longer take a lot of time.
5. Tips to Make Mehndi Design Drawing Easy and Flawless
To improve your mehndi drawing abilities, comply with the verified recommendations:
- Practice Regularly: The more you exercise, the higher you become at drawing mehndi designs.
- Use Light Pressure: Do not press the mehndi cone too tough; this facilitates growing easy and clean lines.
- Start with Simple Patterns: Beginners have to keep away from complicated designs and start with easy styles first.
- Keep Hands Still While Drawing: A shaky hand can result in choppy designs, so rest your hand on a flat surface whilst applying mehndi.
- Allow Mehndi to Dry Naturally: Do no longer use a dryer or fan to speed up the drying process, as it may crack the design.
6. Removing Mehndi and Making It Last Longer
Once the mehndi is dry, it is essential to eliminate it well without unfavourable the layout. Follow the steps:
- Scrape off the dried henna paste lightly. Do no longer wash it with water at once.
- Apply mustard oil or coconut oil to beautify the colour.
- Avoid contact with water for at least 6 hours to allow the mehndi colour to darken.
- Keep fingers heat, as body heat helps in deepening the stain.
Conclusion
Drawing mehndi designs may be clean and amusing if you observe the right techniques. By beginning with simple patterns like vegetation, paisleys, and mandalas, beginners can gain self-assurance and gradually circulate to greater difficult designs. Regular exercise and endurance are key to getting to know the artwork of Mehndi. Whether you are preparing for a marriage, competition, or any special occasion, easy mehndi designs can add charm to your look. With the proper equipment and strategies, all people can create stunning and elegant mehndi design effects.
Read More:-